
Jigs and fixtures
Designing 3D printed fixtures for repeatability
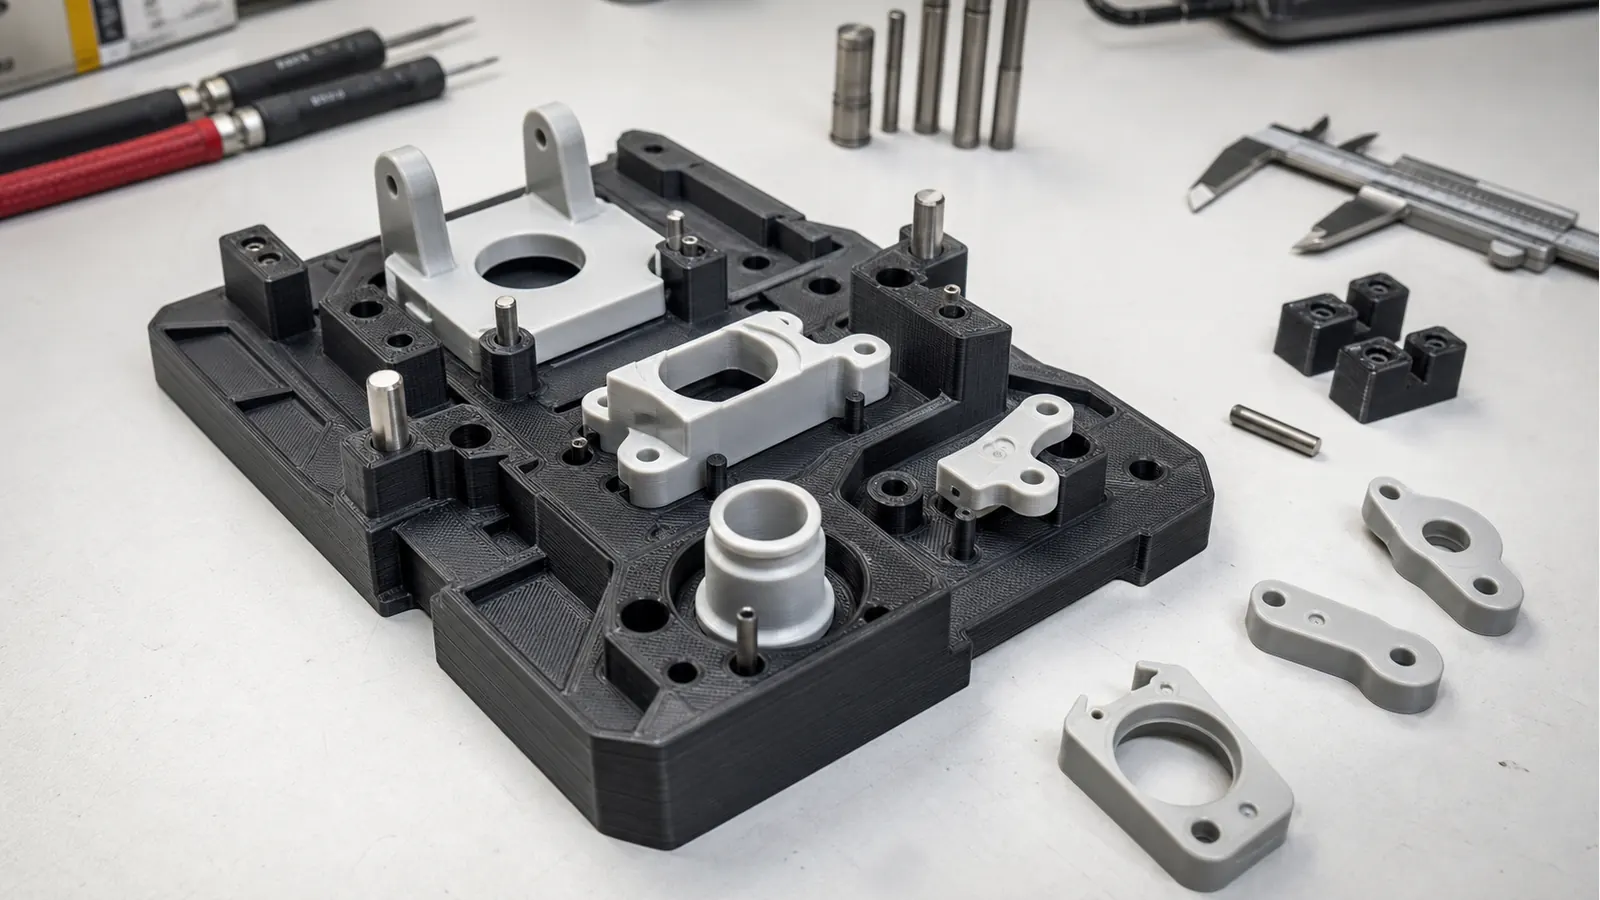
A fixture earns its keep when it makes a result repeatable. For 3D printed fixtures, the biggest wins usually come from smart locating surfaces, material choice, stiffness, and a design that respects real shop handling.
Decide which faces, pins, shoulders, or stops define the part position.
Use clear lead-ins, access reliefs, and stops so the correct position feels natural.
Separate quick verification fixtures from parts that will see clamping, wear, or daily handling.
Jigs and fixtures
Start with how the part locates
A fixture should make the correct position feel natural. Wide, stable registration features usually beat small sharp details that are hard to trust after a few uses. Before adding clamps or fasteners, decide which faces, pins, shoulders, or stops actually define the part location.
If the fixture holds several part revisions, leave room for harmless variation instead of designing every pocket as a perfect CAD duplicate. A fixture that accepts normal variation but still controls the important datums is more useful than a perfect-looking model that only fits one sample.
- Use flat pads, shoulders, pins, or stops to define the important datums.
- Leave intentional clearance around non-critical surfaces.
- Make the loading direction obvious for repeat operators.
- Avoid over-constraining surfaces that do not actually matter to the operation.
Jigs and fixtures
Balance stiffness, wear, and replacement cost
Printed fixtures can be intentionally practical: stiff enough for the job, inexpensive enough to revise, and easy to replace when the process changes. That makes them especially useful for low-volume production, early process development, and work cells that keep changing.
For more demanding work, PETG-CF or PET-CF can make sense because stiffness and dimensional stability often matter more than raw impact toughness. PETG is a good middle ground for many durable shop aids, while PLA can still be useful for quick indoor verification fixtures.
- Add ribs under spans instead of making every wall oversized.
- Use replaceable inserts or sacrificial pads where wear is expected.
- Choose material by environment, clamping load, and expected service life.
- Keep thin walls away from the main clamping load path when possible.
Jigs and fixtures
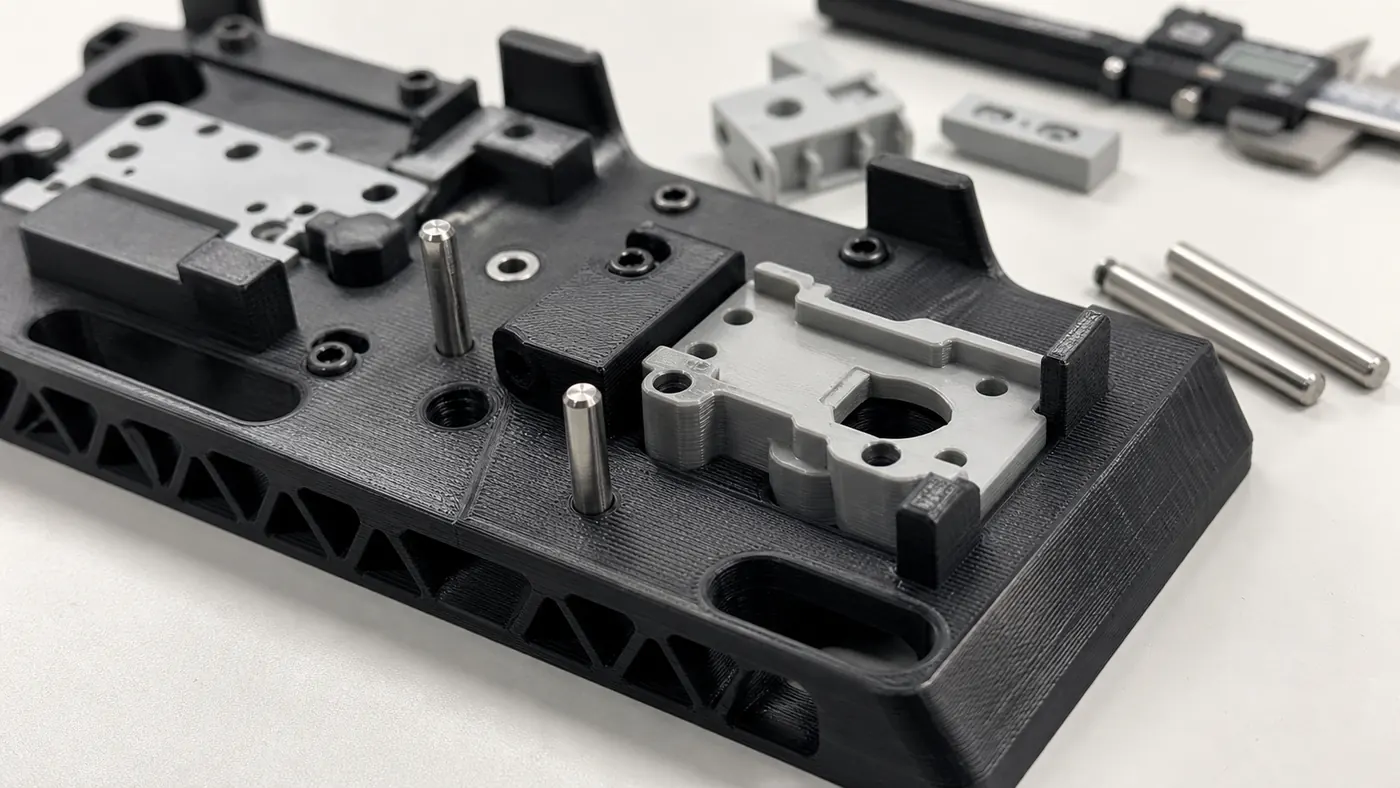
Make clamping and loading obvious
A repeatable fixture is not only a shape. It is a small workflow. The operator should know where the part goes, how it seats, what clamps or pins engage, and when the setup is ready.
Small details can make the difference between a fixture that gets used and one that sits on a shelf. Relief for fingers, lead-in chamfers, visible stop faces, and open access around fasteners all matter.
- Use lead-in chamfers or open pockets so parts do not snag during loading.
- Leave room for fingers, clamps, drivers, and inspection tools.
- Add positive stops where the operator needs a clear end position.
Jigs and fixtures
What to decide before ordering a fixture
The best fixture orders include the fixture file and some context about the process. A model by itself does not explain whether the fixture needs to survive daily use, one project, light assembly, inspection, or clamping pressure.
Call out the surfaces that matter most. If a pocket can be loose but a pin location needs to be consistent, say that. The more the order explains the real operation, the better the material and print setup choices can be.
- Which surfaces locate the part and which areas are just clearance
- How the fixture will be clamped, handled, or loaded
- Whether the fixture is for one project, a short run, or repeated shop use
Before ordering
Quick decision guide
Assembly, inspection, or workholding needs to be repeated without building machined tooling.
The fixture is clamped hard, exposed to heat, or must locate several part revisions.
Mating part model, critical datums, clamping direction, and expected use frequency.
Key takeaways
What matters most
- Repeatability starts with clear locating surfaces and intentional clearance.
- A printed fixture can be designed as a replaceable production aid, not a forever tool.
- Stiffer materials can help fixture performance when clamping or dimensional stability matters.
Need help before ordering?
Want help applying this to your part?
If you understand the article but still want a real person to review the file or recommend a material before ordering, send us the part details here.