Design
Custom 3D printed brackets: what to decide before ordering
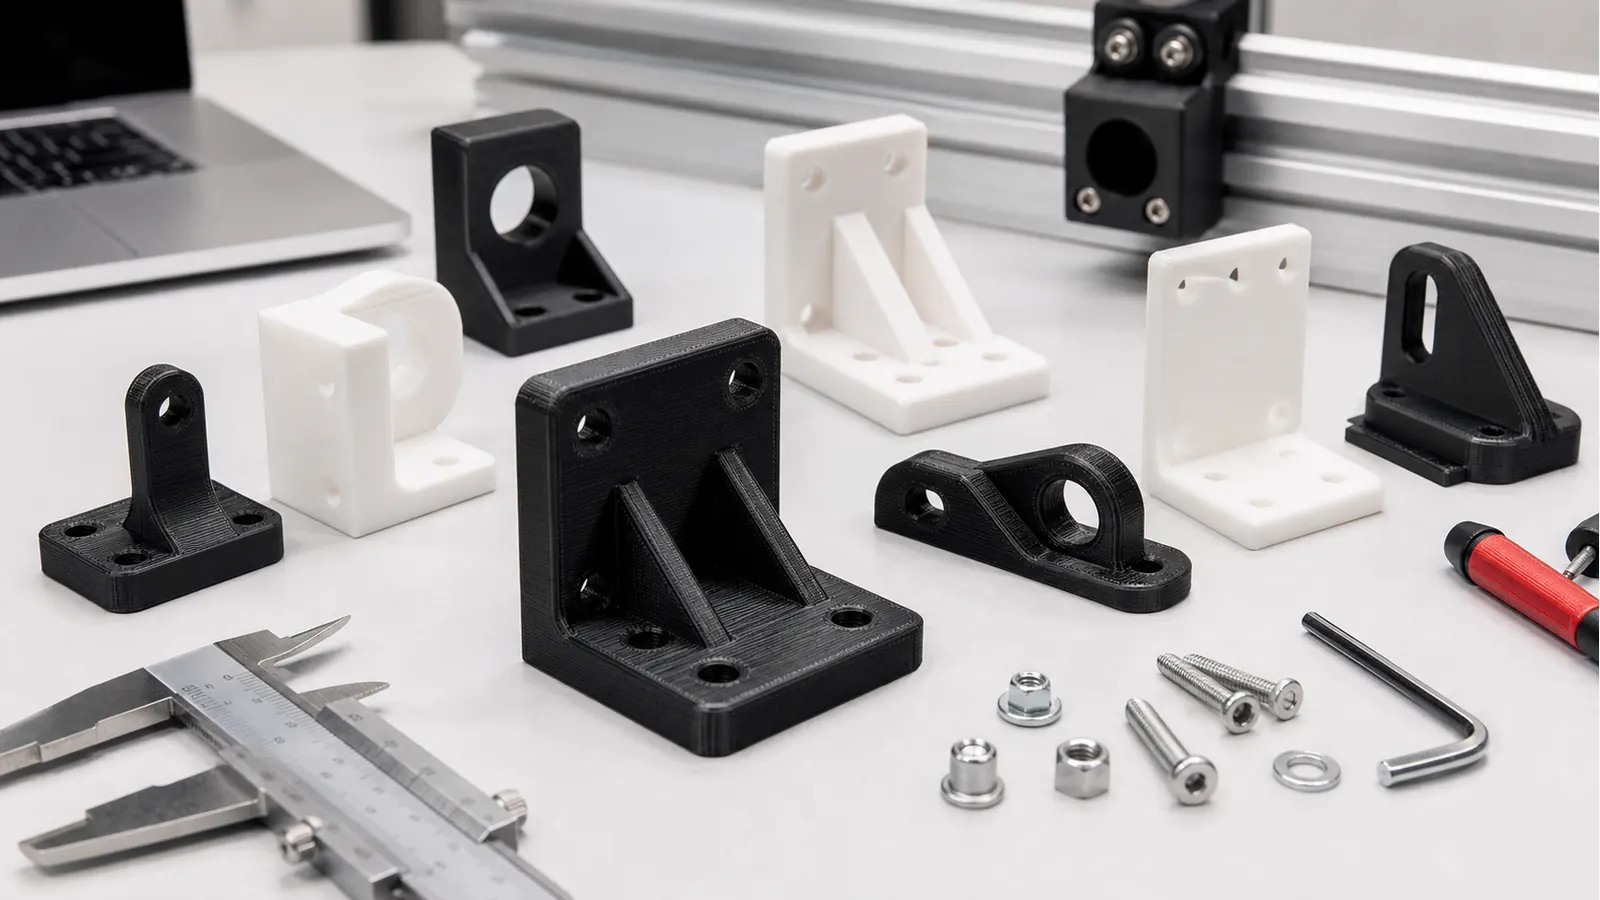
Custom 3D printed brackets are useful because they can match the exact space, hole pattern, and job. The best orders start with a few practical decisions about load, mounting, material, and fit.
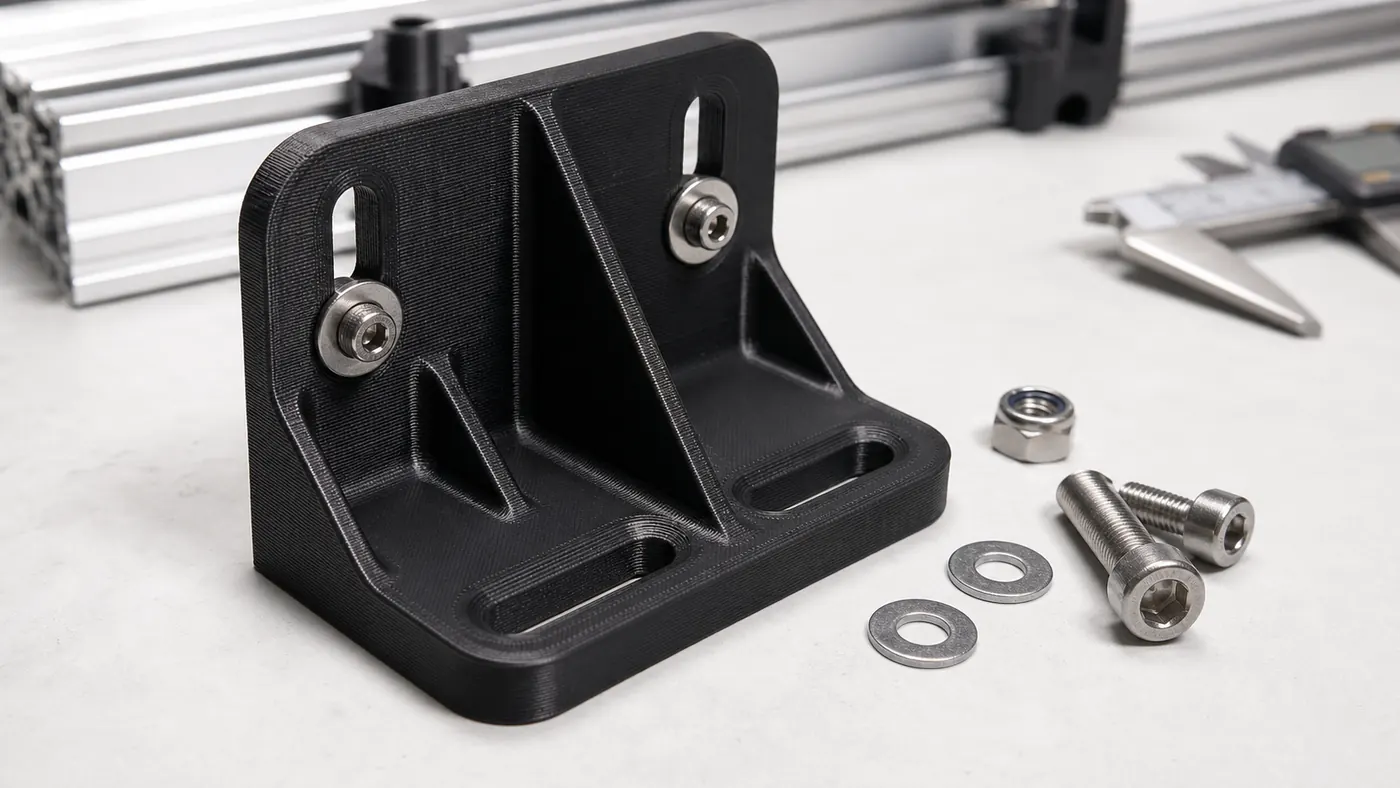
Decide whether the bracket positions, supports, resists vibration, or carries leverage.
Leave wall around holes, plan screw-head clearance, and use slots when the mating part varies.
Pick PLA, PETG, or carbon-filled options based on environment, stiffness, and repeated use.
Design
Know what the bracket is holding
A bracket that only positions a lightweight sensor is a different part from a bracket that carries leverage, vibration, or repeated adjustment. The same basic L-shape can be perfectly reasonable in one use and a poor choice in another.
Before uploading the file, think through the load direction, how often the bracket will be touched, and whether failure would be annoying or costly. That context can change material choice, wall thickness, print orientation, and whether the part needs review before checkout.
- Identify the main force direction and any bending leverage.
- Add fillets and ribs near inside corners and mounting transitions.
- Avoid putting all strength into a thin tab or small screw boss.
- Treat vibration and repeated adjustment as real design inputs, not afterthoughts.
Design
Plan the mounting details
Mounting holes, slots, countersinks, inserts, and clearances often decide whether a bracket feels professional or frustrating. A bracket can have a great outline and still fail because a screw head bottoms out, a hole prints too tight, or there is not enough material around a fastener.
If the bracket needs to line up with existing hardware, give the printed part enough tolerance to account for both the print process and the real object it attaches to. Slots are often better than exact holes when the mating part is unknown, worn, or hand-measured.
- Use slots when the mounting target may vary slightly.
- Leave enough wall around holes for strength and fastener pressure.
- Consider heat-set inserts or post-drilled holes for demanding hardware.
- Check screw head clearance, washer size, and tool access before ordering.
Design
Choose material by environment
Material choice should follow the bracket's real environment. Indoor positioning brackets can often start simple, while hot, outdoor, stiff, or repeated-use brackets deserve more careful selection.
PETG is often a safer everyday choice than PLA when a bracket will be handled, flexed, or exposed to moisture. Carbon-filled materials can help when stiffness and a more stable feel matter, but they are not a magic answer for every load case.
- Use PLA mainly for quick indoor fit checks and light-duty brackets.
- Use PETG for tougher everyday parts and more forgiving functional use.
- Consider PETG-CF or PET-CF when stiffness and dimensional stability matter.
Design
What to include with a bracket order
A strong bracket order is more than a file upload. The file gives the geometry; the notes explain what the bracket has to survive. Even a short sentence about the use case can help catch the obvious material or fit risks.
For replacement or retrofit brackets, include the real hole spacing, fastener size, expected load, and whether the bracket mounts to metal, wood, plastic, extrusion, or another printed part.
- Fastener size, hole spacing, and whether slots are acceptable
- Expected load direction and whether the bracket sees vibration or heat
- Whether appearance matters or function is the only priority
Before ordering
Quick decision guide
A custom bracket needs a specific hole pattern, offset, clearance, or low-volume geometry.
The bracket carries leverage, sees vibration, lives in heat, or depends on snap-fit features.
Fastener size, hole spacing, mounting surface, expected load, and whether appearance matters.
Key takeaways
What matters most
- Load direction, mounting details, and fit matter more than the bracket outline alone.
- Ribs, fillets, and enough material around fasteners make printed brackets more reliable.
- A short note about the use case can help material and print setup decisions.
Need help before ordering?
Want help applying this to your part?
If you understand the article but still want a real person to review the file or recommend a material before ordering, send us the part details here.